Xamarin Forms recently released an awesome feature called Shell reduces the complexity of mobile application development by providing the fundamental features that most mobile applications require.
Shell combines the power of MasterDetailPage, TabbedPage, NavigationPage and BottomTab to create an awesome experience for the user while making it easy for developers to implement.
Let’s deep our hands into what Xamarin Forms shell has to offer by showing some some example.
- Open Visual Studio (in my case VS 2019) and create a new project, select the Xamarin Forms option in the project templates and give your project a name (in my case “AppShellTest”) to continue.
- In the project templates window for Xamarin Forms, select the Shell template as shown below.

- In your project folder hierarchy, open the AppShell.xaml
- The XAML implementation of the should look like the following
<Shell xmlns="http://xamarin.com/schemas/2014/forms"
     xmlns:x="http://schemas.microsoft.com/winfx/2009/xaml"
     xmlns:d="http://xamarin.com/schemas/2014/forms/design"
     xmlns:mc="http://schemas.openxmlformats.org/markup-compatibility/2006"
     mc:Ignorable="d"
     xmlns:local="clr-namespace:AppShellTest.Views"
     Title="AppShellTest"
     x:Class="AppShellTest.AppShell">

     ...
    <!-- Your Pages -->
    <TabBar>
        <Tab Title="Browse" Icon="tab_feed.png">
            <ShellContent ContentTemplate="{DataTemplate local:ItemsPage}" />
        </Tab>
        <Tab Title="About" Icon="tab_about.png">
            <ShellContent ContentTemplate="{DataTemplate local:AboutPage}" />
        </Tab>
    </TabBar>
</Shell>
Running the application we have this:


The code portion that declares the view as show above is this
<!-- Your Pages -->
<TabBar>
     <Tab Title="Browse" Icon="tab_feed.png">
          <ShellContent ContentTemplate="{DataTemplate local:ItemsPage}" />
     </Tab>
     <Tab Title="About" Icon="tab_about.png">
          <ShellContent ContentTemplate="{DataTemplate local:AboutPage}" />
     </Tab>
</TabBar>
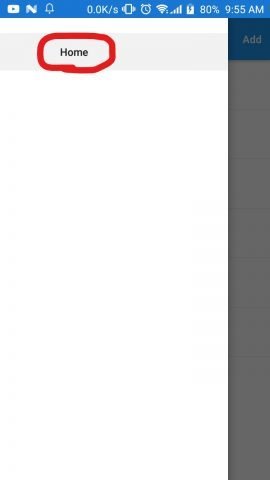
Looking at the code snippet above and the result it produced, we noticed that there is no hamburger menu and we do not have a flyout. To implement this, we need to modify our code as show below:
    <FlyoutItem Title="Home">
        <Tab Title="Browse" Icon="tab_feed.png">
            <ShellContent ContentTemplate="{DataTemplate local:ItemsPage}" />
        </Tab>
        <Tab Title="About" Icon="tab_about.png">
            <ShellContent ContentTemplate="{DataTemplate local:AboutPage}" />
        </Tab>
    </FlyoutItem>
And the result of this modification is this:


That’s it for now!
Start using Xamarin Forms Shell in your applications and enjoy the easy implementations that it provides.
If you have any questions or comment, please leave it in the comment section below and you can watch the video of this article below.
